



Flooring estimate: how to price a job from plans
In this article
- What Goes Into a Flooring Estimate?
- Step 1: Measure Each Room From the Plans
- Step 2: Add Waste
- Step 3: Price Pad, Underlayment, Trim and Transitions
- Step 4: Price the Labor
- Step 5: Add Markup and Check the Margin
- Step 6: Present Options, Not Just a Total
- How Bolster Builds a Flooring Estimate From Plans
- Flooring Estimate Checklist
- Frequently Asked Questions
A flooring estimate looks simple from the outside: measure the floor, multiply by a price, add labor. Anyone who has priced a whole house knows it is not. Every room has its own product, every product has its own pad or underlayment, the transitions change wherever two floors meet, and the baseboards stop at every door. Miss one of those and the margin on the job goes with it.
This guide walks through how to write a flooring estimate from a set of plans, room by room, and how to turn it into a quote your customer actually wants to sign. At the end we show how Bolster does the takeoff, the estimate and the proposal for you, in a few minutes.
What Goes Into a Flooring Estimate?
A complete flooring estimate covers four things for every room:
- The floor itself: the product, the measured area and an allowance for waste.
- What goes under it: carpet pad, foam or cork underlayment, moisture barrier or tile backer.
- What goes around it: baseboards, quarter round, transition strips and reducers where floors meet.
- The labor: removal of the old floor, subfloor prep, installation and finishing.
Price all four on measured quantities and the estimate holds up. Price only the floor and the rest comes out of your margin.
Step 1: Measure Each Room From the Plans
Work room by room, not as one big number. Rooms get different products, and the customer will want to change some of them, so each room needs its own area.
For a rectangular room, length times width gives the square footage. Break L-shaped and irregular rooms into rectangles and add them up. Our guide to calculating square feet covers the awkward shapes.
Take out anything that does not get flooring: kitchen cabinets and islands, built-in vanities, fireplaces and stairs that are priced separately. Then measure the perimeter of each room for baseboards, minus the door openings.
Step 2: Add Waste
You never install exactly the area you measured. Cuts at the walls, pattern matching and damaged boards all use extra material. Common allowances:
- Straight-lay hardwood, laminate and vinyl plank: about 5 to 10 percent.
- Tile: about 10 percent, more for large-format or patterned tile.
- Diagonal, herringbone or chevron layouts: 15 percent or more.
- Carpet: depends on the roll width and the seam layout, so plan the seams before you order.
Round up to full boxes or rolls. A flooring calculator does the box math quickly if you are checking a single room.
Step 3: Price Pad, Underlayment, Trim and Transitions
This is where most flooring estimates leak money. Each floor type brings its own companions:
- Carpet: pad, tack strip and seaming.
- Floating hardwood, laminate and vinyl plank: foam or cork underlayment, and a moisture barrier over concrete.
- Glue-down hardwood: adhesive and moisture testing.
- Tile: backer board or membrane, thinset, grout and trim pieces.
Wherever two floors meet you need a transition: a T-mold between floors of the same height, a reducer down to a lower floor, a threshold at exterior doors. Count them from the plans, because they add up across a whole house.
Step 4: Price the Labor
Price labor on the same measured quantities: installation per square foot by product, plus removal and disposal of the old floor, subfloor leveling or repair, furniture moving if you offer it, and baseboard installation per linear foot. Stairs are usually priced per step.
Step 5: Add Markup and Check the Margin
Add your markup to cover overhead and profit, and check the margin on the finished number, not just the markup percentage. They are not the same thing. Our markup vs margin guide explains the difference.
Step 6: Present Options, Not Just a Total
A single total invites a single question: can you do it for less? Options change the conversation. Show a good, better and best floor for the main areas, and let the customer choose.
The catch is that a customer cannot judge a floor from a product code or a two-inch swatch. They need to see it in a room, and they need to see what it does to the price. When they can, a lot of them choose the better floor.
How Bolster Builds a Flooring Estimate From Plans
Bolster now does the takeoff, the estimate and the proposal in one pass.
Upload the plan and describe the job. In our walkthrough, Mike uploads a floor plan and types "estimate to do the flooring in this house". That is the whole input.
The takeoff runs in 3D. Bolster organizes the job by room and matches the floor to the room: hardwood through the main areas, carpet in the bedrooms, tile in the bathrooms. It places the baseboards, knows where the doors are, and takes the cabinets out of the floor area. See takeoff software for more.
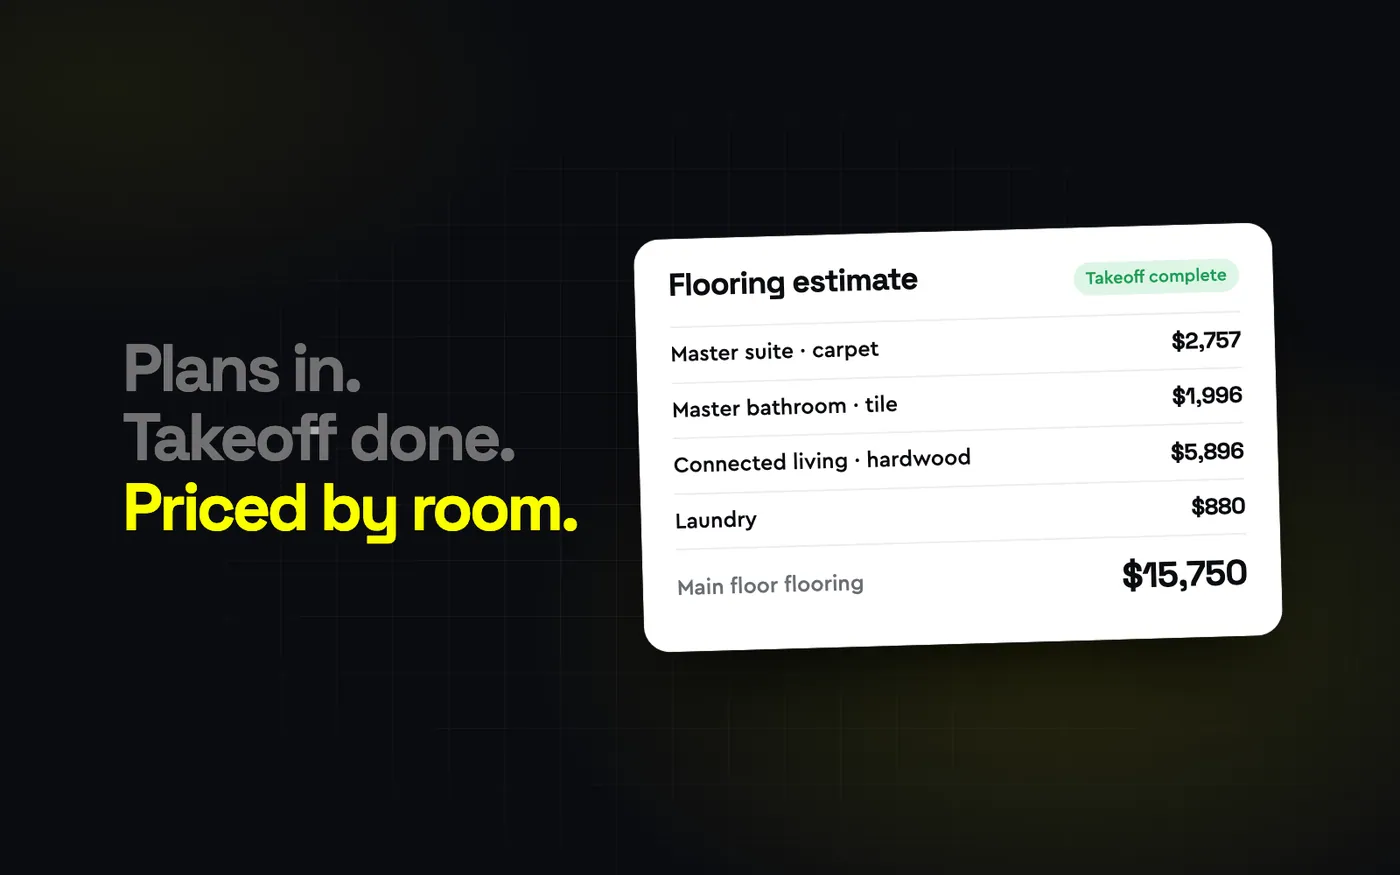
The estimate prices itself. Each room comes back with its floor, pad, trim and labor priced on the measured quantities. In the walkthrough the full run took about two and a half to three minutes, from upload to a complete quote. Everything stays editable in the estimate.
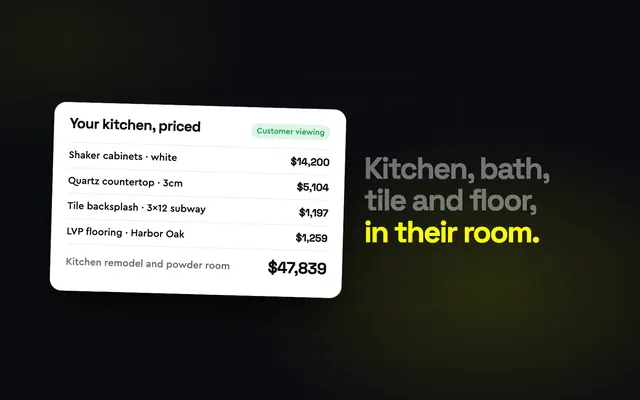
The proposal shows every choice in a room. Your customer sees each area with its own room picture. When they change the floor, the picture changes and the price updates on the spot, and Bolster swaps the underlayment, sundries and transition edges to the ones that match the new floor.
The Lookbook sells the upgrade. The Lookbook gives your customer 24 designer looks, like Coastal, Craftsman and Modern farmhouse, built from the materials on your estimate, with staged room photos, Budget, Balanced and Best options, and one click to make a look theirs.
Flooring Estimate Checklist
Before you send it, check that every room has:
- A measured area with cabinets and built-ins taken out
- A waste allowance that matches the product and the layout
- Pad or underlayment, and a moisture barrier where needed
- Baseboard and trim on the measured perimeter, minus doors
- A transition everywhere two floors meet
- Removal, prep and installation labor
- Markup checked against your target margin
- At least two options for the main areas
Frequently Asked Questions
How do you estimate a flooring job?
Measure each room from the plans, take out cabinets and built-ins, add a waste allowance for the product and layout, then price the floor, pad or underlayment, trim, transitions and labor on those quantities. Add markup and check the margin.
How much waste should I add to a flooring estimate?
Roughly 5 to 10 percent for straight-lay hardwood, laminate and vinyl plank, about 10 percent for tile and 15 percent or more for diagonal or herringbone layouts. Carpet waste depends on the roll width and seam plan.
What should a flooring quote include?
The product and area for each room, pad or underlayment, trim and transitions, removal and installation labor, the total, and ideally a few options so the customer can choose between good, better and best.
Can software do a flooring takeoff from plans?
Yes. In Bolster you upload the floor plan and describe the job, and it runs a 3D takeoff organized by room and builds a priced estimate from it, then turns that into a visual proposal. Book a demo and we will run one on your own plans.